Over the years i have worked and integrated with many payment systems and gateways. Some have been server-to-server and some have been “front-end” systems. Some have been extremely simple to integrate and some have been quite complex with fraud prevention and management as part of the integration.
A server to server integration would be where the shopper inputs his credit card details on your website and then you connect to a payment gateway to authorize and settle the payment. This generally requires that your website is PCI compliant and so on.
A front end integration would be where, the shopper is redirected to a payment provider’s website where he/she would enter their CC and shipping details. On completion they are generally redirected back to the original website. This form of integration with a payment provider is most widely used.
Paypal provides various integration mechanisms front and backend, however the easiest one, and the most used one is the front end Web Payment Standard. That is where you see the yellow pay button.
In this tutorial i will build a quick sample application which will do the following
- Show an HTML form with a Pay Button
- It will redirect you to Paypal website
- Explain how you can use IPN (“Instant Payment Notification”) feature to get notifications from paypal about payment status
Since this is meant to be a primer i will keep it very short. However , before we start we need sample accounts on PayPal Sandbox.
Paypal sandbox is a test environment which lets you create business and buyer accounts to test your code. This way you can try out your integration without having a real business or buyer account and without having to use real money to test.
Just head over to https://developer.paypal.com/ and sign up.
Once you have signed up and you can login. After login create “Pre-Configured” business and buyer accounts.
you can see i have two accounts in the screen shot.
You can now enter the back-office site of your test business account (By clicking the ‘Enter Sandbox Test Site’), where we will tweak a couple of settings to support our sample application.
Now we create a simple Pay Button using some hidden HTML fields and a Button, these fields will be POST to the Paypal server when you press the button.
<html>
<body>
<form action="https://www.sandbox.paypal.com/cgi-bin/webscr" method="post">
<input type="hidden" name="business" value="usm_1326193345_biz@worldticket.net">
<input type="hidden" name="cmd" value="_xclick">
<input type="hidden" name="item_name" value="Hot Sauce-12 oz. Bottle">
<input type="hidden" name="amount" value="5.95">
<input type="hidden" name="currency_code" value="USD">
<input type="hidden" name="return" value="http://localhost:8080/paypalsample/return.html">
<input type="hidden" name="rm" value="2">
<input type="hidden" name="cancel_return" value="http://localhost:8080/paypalsample/return.html"> <input type="image" name="submit" border="0"
src="https://www.paypal.com/en_US/i/btn/btn_buynow_LG.gif" alt="PayPal - The safer, easier way to pay online">
<img alt="" border="0" width="1" height="1" src="https://www.paypal.com/en_US/i/scr/pixel.gif" > </form>
</body>
</html>
Save this code in a file called “paypal.html” and open it in a browser and you will see the ‘Buy Now’ button.
Pressing this button will take you to the Paypal payment page. Before going fruther lets have a quick look at this simple code.
form action : is https://www.sandbox.paypal.com/cgi-bin/webscr for sandbox account, while this URL for production use will be https://www.paypal.com/cgi-bin/webscr
business : is the id of your paypal business account ID or the email address you used to create the business account.
cmd : identifies the command you are sending to the paypal server, ‘_xclick’ means that the button user has pressed is a “Buy Now” button. There are other possible values if the action was to add to cart or donations or subscriptions etc..
item_name : Is the name of the item you are about to sell
amount and currency are obvious :-)
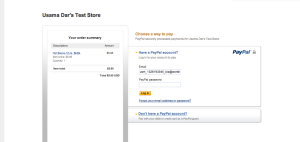
Now pressing this Buy Now button will take you to the standard Paypal payment page, which is completely customizable, but that is not in the scope of this blog.
Here you can pay by logging in with the test merchant account that we created earlier.
Now for most people this is all that is needed. Paypal will process the payment and show you everything you need to see, and you can tweak this behaviour from the admin panel of the business account (you can also customize the payment page)
For some shops (i.e Airline Tickets) you want people to be redirected to your own website, so they can print their receipts or itineraries. In that case, you first need to turn on Auto-redirect , so people are automatically redirected to the originating website, and also you can enable IPN or Instant Payment Notification. This is just a URL which paypal will send the results of the payment transaction by posting certain values, you can read these values to determine if payment worked or failed so you can show the appropriate result to the use which he or she is redirected back to your website.
if Auto-redirect is enabled , buyers will be retured to the URL sent as “return” form variable, and incase user decides to cancel the payment , he/she will be redirected to the URL defined in “cancel_return” form variable.
if you specify an additional “notify_url” form value, When this form value is specified then Paypal server will send a notification to that URL. see the diagram below 
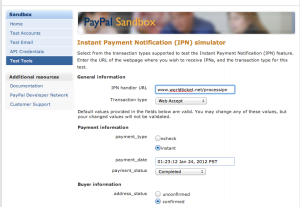
On that URL you need to have a listener (i.e a servlet or a JSP script) which would do something like this. In short you receive the values, validate them by reposting them to the paypal server to counter the man in the middle attack, and then use the status codes to determine if payment passed and failed and why… Paypal also provides you with an IPN simulator tool in the test tools area of the developer portal. You can use this IPN simulator to send IPN requests to your listener to test it. Very handy indeed.
There is another option similar to IPN called PDT. PDT is not push based like IPN, instead , paypal on return gives you a token which can be used to retrieve payment details and it’s current status.
So that was a quuick and dirty guide to Paypal integration
you can find more documentation here.
HTML forms variables guide here
Web Standards Payment Guide here


